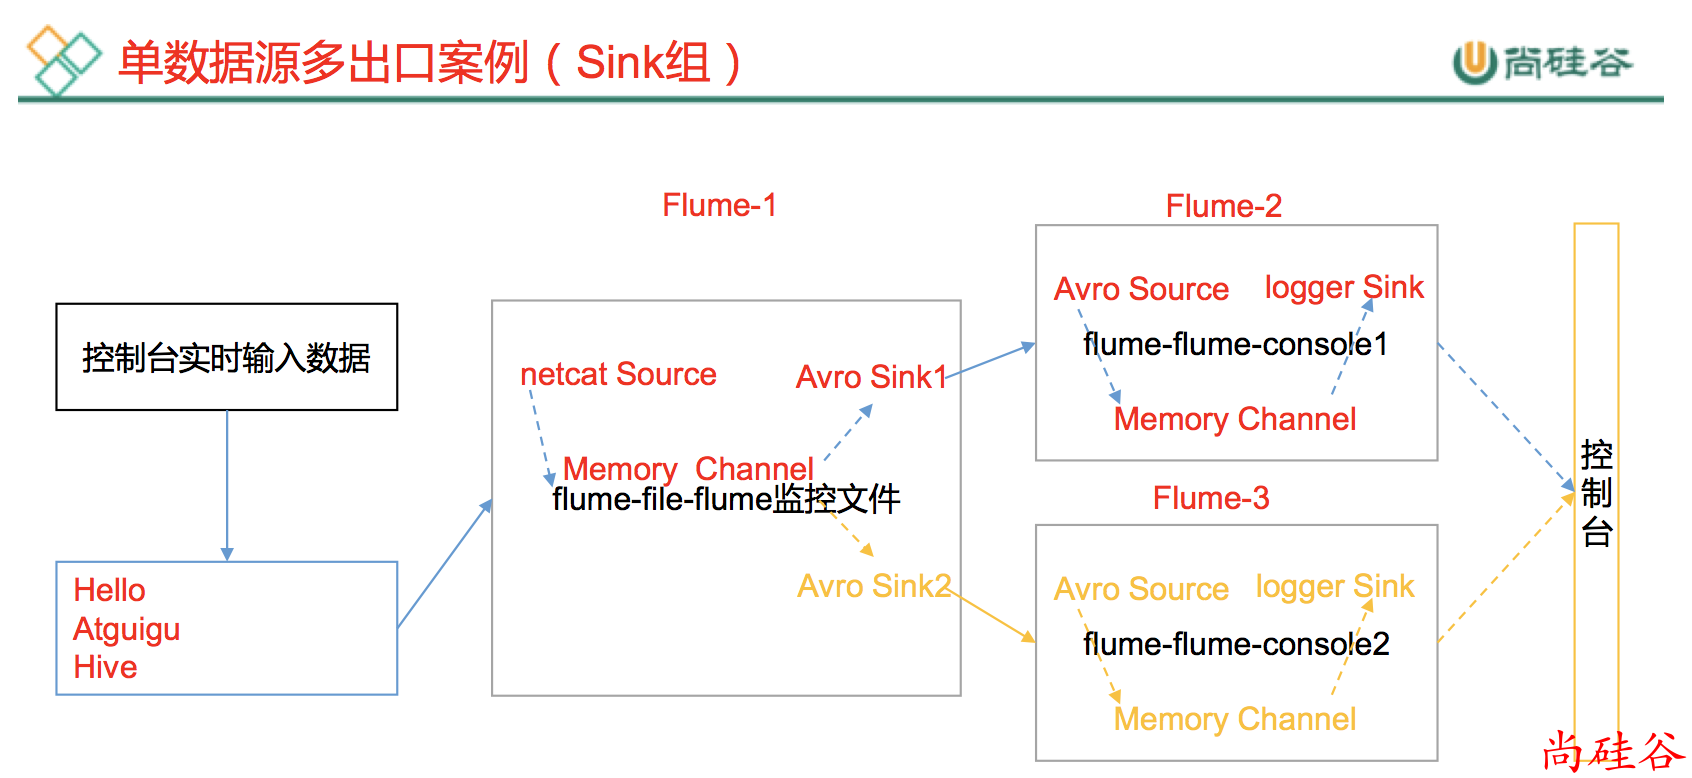
3.5 单数据源多出口案例(Sink组)
单Source和Channel, 多Sink(负载均衡)
3.5.1 案例需求
使用 Flume-1 监控 44444 端口数据
Flume-1将数据传递给Flume-2,Flume-2负责在控制台显示。
同时Flume-1将数据也发送传递给Flume-3,Flume-3也负责存储在控制台显示
3.5.2 案例分析
3.5.3 操作步骤
步骤1: 准备工作
在/opt/module/flume/job目录下创建group2文件夹, 用来存放 3 个 agent 的配置文件.
步骤2: 创建第 1 个 agent 的配置文件: flume-netcat-flume.conf
配置 1 个接受网络端口数据的 source 和 1 个 channel、两个 sink,分别输送给flume-flume-console1 和 flume-flume-console2。
文件内容如下:
# Name the components on this agent
a1.sources = r1
a1.channels = c1
# 配置sink组
a1.sinkgroups = g1
a1.sinks = k1 k2

# Describe/configure the source
a1.sources.r1.type = netcat
a1.sources.r1.bind = hadoop201
a1.sources.r1.port = 44444

a1.sinkgroups.g1.processor.type = load_balance
a1.sinkgroups.g1.processor.backoff = true
a1.sinkgroups.g1.processor.selector = round_robin
a1.sinkgroups.g1.processor.selector.maxTimeOut=10000

# Describe the sink
a1.sinks.k1.type = avro
a1.sinks.k1.hostname = hadoop201
a1.sinks.k1.port = 4141

a1.sinks.k2.type = avro
a1.sinks.k2.hostname = hadoop201
a1.sinks.k2.port = 4142

# Describe the channel
a1.channels.c1.type = memory
a1.channels.c1.capacity = 1000
a1.channels.c1.transactionCapacity = 100

# Bind the source and sink to the channel
a1.sources.r1.channels = c1
a1.sinkgroups.g1.sinks = k1 k2
a1.sinks.k1.channel = c1
a1.sinks.k2.channel = c1
步骤3: 创建第 2 个 agent 的配置文件:flume-flume-console1.conf
配置上级 Flume 的输出为 Source,输出是到本地控制台。
文件内容如下:
# Name the components on this agent
a2.sources = r1
a2.sinks = k1
a2.channels = c1

# Describe/configure the source
a2.sources.r1.type = avro
a2.sources.r1.bind = hadoop201
a2.sources.r1.port = 4141

# Describe the sink
a2.sinks.k1.type = logger

# Describe the channel
a2.channels.c1.type = memory
a2.channels.c1.capacity = 1000
a2.channels.c1.transactionCapacity = 100

# Bind the source and sink to the channel
a2.sources.r1.channels = c1
a2.sinks.k1.channel = c1
步骤4:创建第 3 个 agent 的配置文件:flume-flume-console2.conf
配置上级 Flume 的输出为 Source,输出是到本地控制台。
# Name the components on this agent
a3.sources = r1
a3.sinks = k1
a3.channels = c2

# Describe/configure the source
a3.sources.r1.type = avro
a3.sources.r1.bind = hadoop201
a3.sources.r1.port = 4142

# Describe the sink
a3.sinks.k1.type = logger

# Describe the channel
a3.channels.c2.type = memory
a3.channels.c2.capacity = 1000
a3.channels.c2.transactionCapacity = 100

# Bind the source and sink to the channel
a3.sources.r1.channels = c2
a3.sinks.k1.channel = c2
步骤5: 使用 3 个配置文件开启 3 个flume
flume-ng agent --conf conf/ --name a3 --conf-file job/group2/flume-flume-console2.conf -Dflume.root.logger=INFO,console
flume-ng agent --conf conf/ --name a2 --conf-file job/group2/flume-flume-console1.conf -Dflume.root.logger=INFO,console
flume-ng agent --conf conf/ --name a1 --conf-file job/group2/flume-netcat-flume.conf
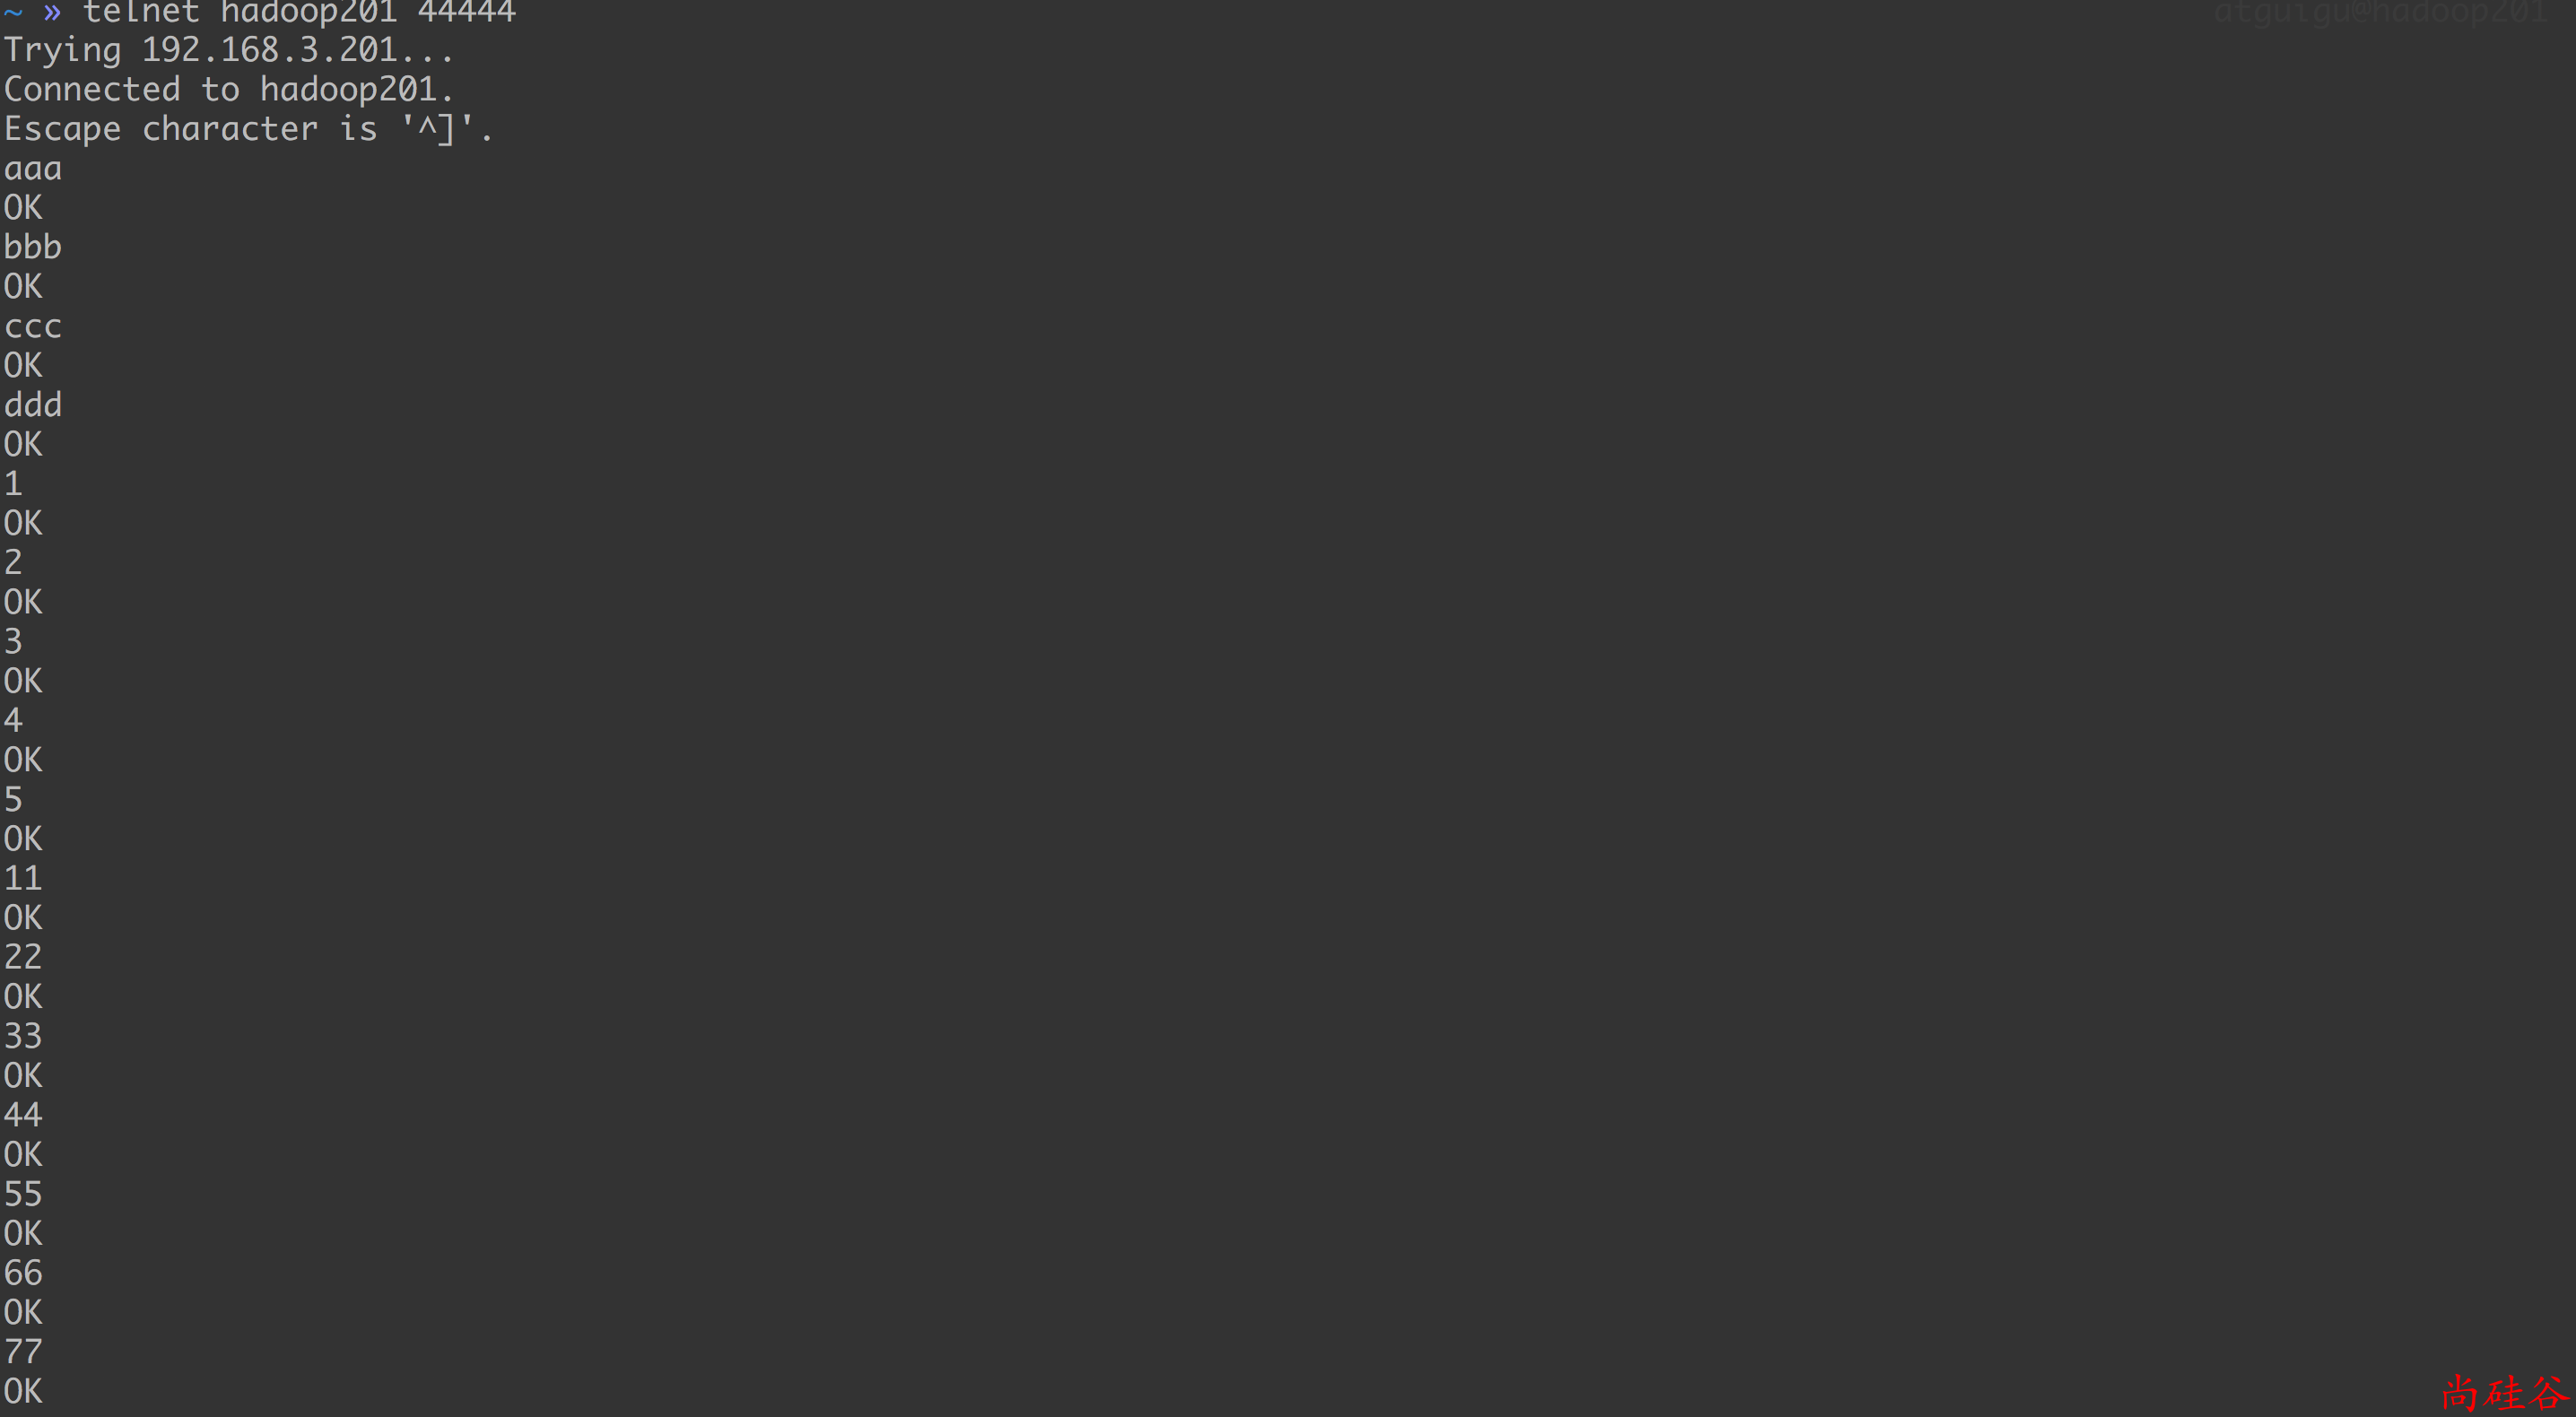
步骤6: 使用 telnet 工具向本机的 44444 端口发送内容
telnet localhost 44444
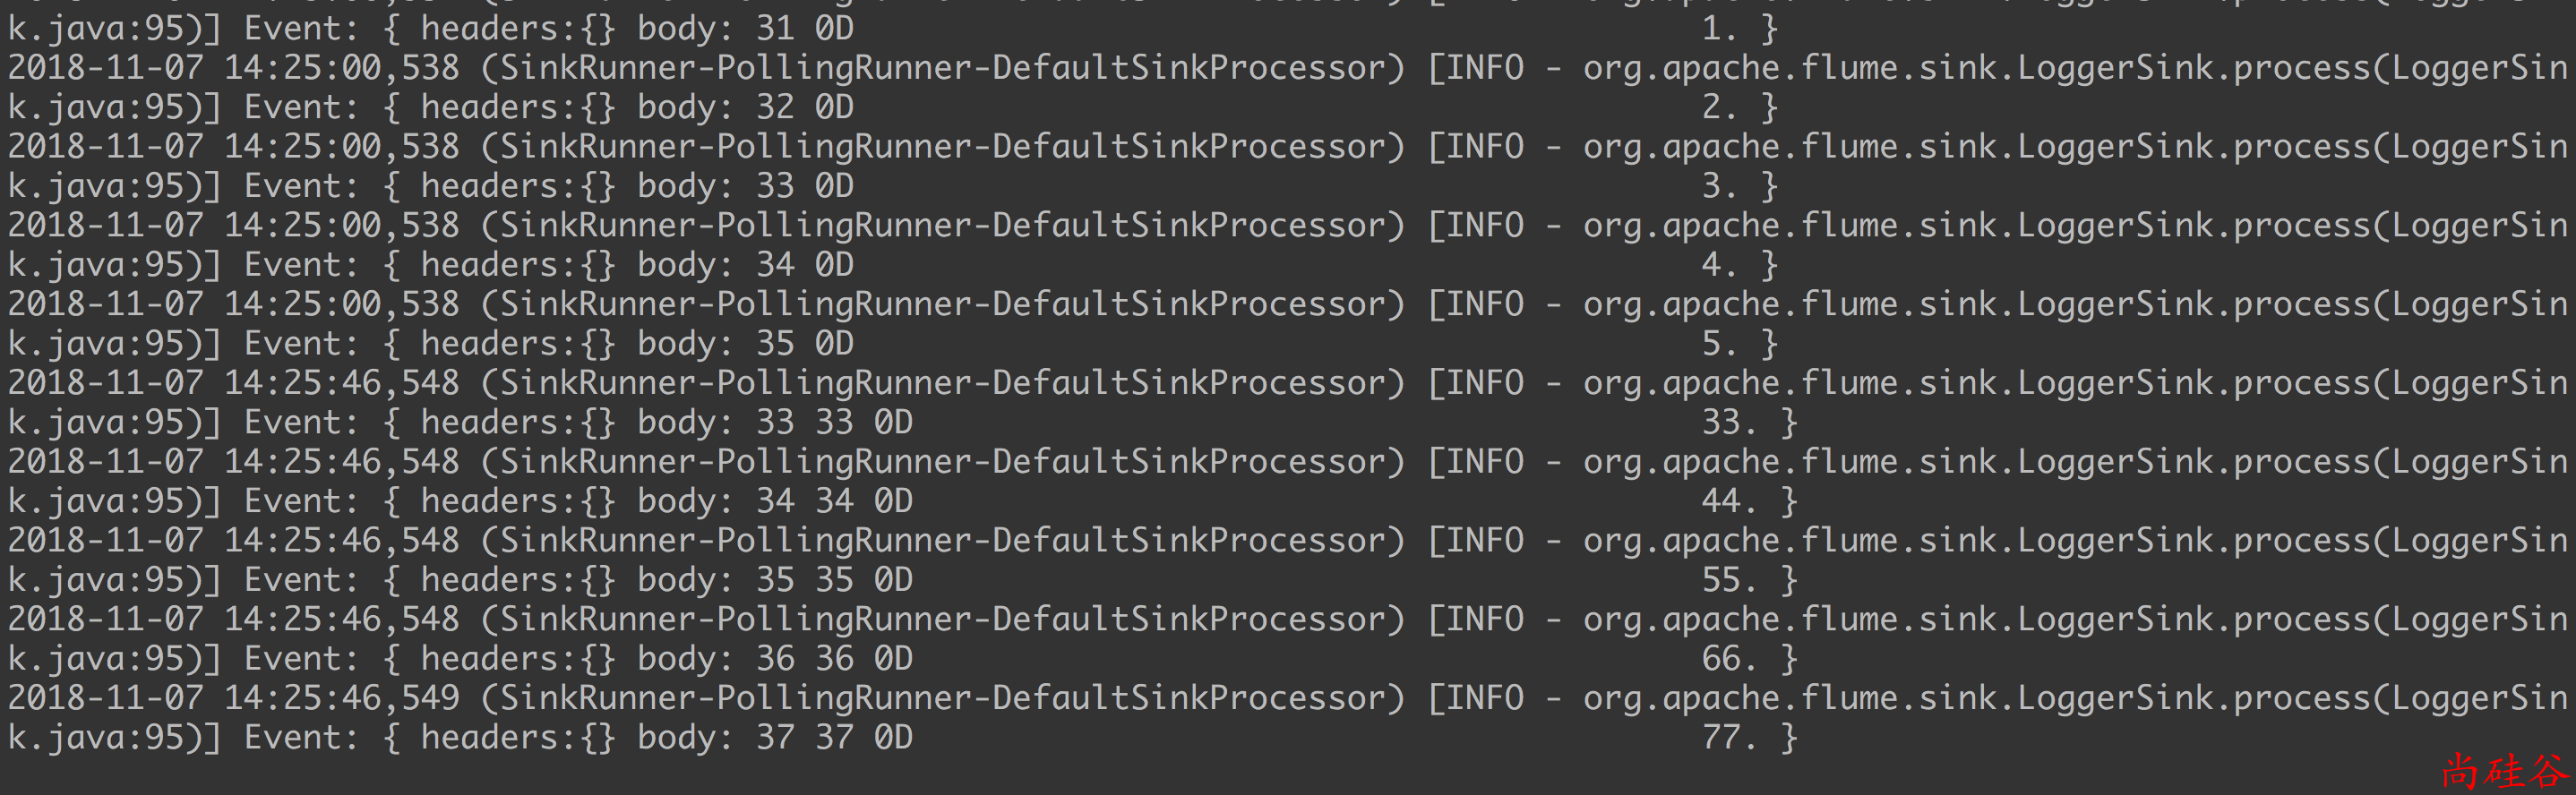
步骤7: 查看Flume2及Flume3的控制台打印日志
当我们发送信息的时候, Flume2 和 Flume3 不会同时得到信息. flume 会进行负载均衡.